Just because you do have not enough time to work out at a gym does not mean that you have to miss out on the benefits of exercise. Home-based exercise programs can give you a complete body workout at your home.
So, we will discuss some home-based exercises here for overall fitness, weight loss, muscle building, and strength training.
You can easily find a large number of exercise programs that you can do at your home for overall fitness, weight loss, muscle building, or strength training.
An exercise program, whether for the home or gym, links both cardiovascular and weightlifting exercises. Typically, your weightlifting method should consist of ten to twelve exercises.
Your exercise should include all muscle groups. Do a few exercises for each muscle group to get the best and fastest results.
You should change your workout program every couple of weeks. As your body adjusts to the same habit, your progress will slow down. Challenge your body by doing various cardio and strength training exercises. Change your exercises regularly.
1. Bench Press

The bench press workout is very essential for the muscles of your chest as well as the triceps of the back of the arms and shoulder muscles. You can easily do this exercise at home with barbells and dumbbells.
You can do this exercise regularly as part of an upper-body workout for strength and muscle development at your home.
1.1 Benefits of Bench Press
There are a lot of bench press benefits. The bench press is a mixture of exercises that involve:
- The major part of the chest.
- The anterior deltoids of the shoulder.
- The triceps brachii of the upper arm.
- It develops and encourages the growth of these muscles.
- The bench press is a useful exercise that helps you with any daily exercise that requires pushing or carrying.
- The bench press can help rebuild muscle stability for players who primarily use pulling muscles.
RELATED: Best Long-Head Triceps Exercises For Bigger Arm
1.2 How to Do Bench Press at Home
- You have to lie flat on the bench. Your eyes should be closely followed by the front of the barbell rack uprights.
- Your shoulders and head should be flat on the bench with a slight bend in the bone. Your feet should be flat on the floor.
- Grip the bar with your thumbs on the outside of your closed fist.
- Now you should remove the barbell from the rack and lock the joints of your elbows out before dropping the bar to the chest.
- Now it’s time to take a deep breath and raise the bar to above the chest with arms extended. You should not watch the bar, focus on the ceiling only.
- Now, return the bar to just above the chest and repeat the exercise again and again. Three sets of 5 reps is a suggested number for beginners.
So, you should do these steps very carefully because if you lose your control it can be very dangerous for you. So, repeat the steps carefully.
2. Pushups

Regular pushups are beneficial for strengthening the upper body part. Pushups work for the triceps, pectoral muscles, and shoulders muscles.
Pushups are a quick and effective exercise for building the strength of the body. They can be done at home and it doesn’t require any equipment to do it.
2.1 How to do an Effective Pushup
There are a few steps to do an effective pushup at home.
- Start kneeling on the floor and take your feet together behind you.
- Bend ahead to position yourself in a high planking. Your shoulders should be placed up from your hands.
- Now, you should lower your body toward the floor very slowly. Keep a stiff torso and keep your head adjusted with your backbone. Don’t let your lower back dip or your hips hike uphill.
- You should continue to lower yourself until your chest touches the floor. Your elbows may swell out during the earthward move.
- Press upward with your arms. Continue pushing until your arms are completely extended at your elbows.
- Now, repeat the downward movement again and again.
Doing pushups regularly can be more effective for you if you are looking for a consistent exercise routine at home.
You will likely notice gets in upper body strength if you do pushups every day at home.
If you want the best results, continue to add variety to the types of pushups you do in your daily exercise.
2.2 The Take Away and Benefits of Pushups
- Doing pushups daily will help you gain upper body strength easily. But you should keep in mind you’ll need to mix up the types of pushups you are doing after some sets to continue to challenge your muscles.
- If you want to try a pushup challenge to do the exercise regularly or many times a week, try different types of pushups at home. The variety will keep your muscles separate and help you get more fit.
RELATED: Top 10 Benefits of Doing Push-Ups
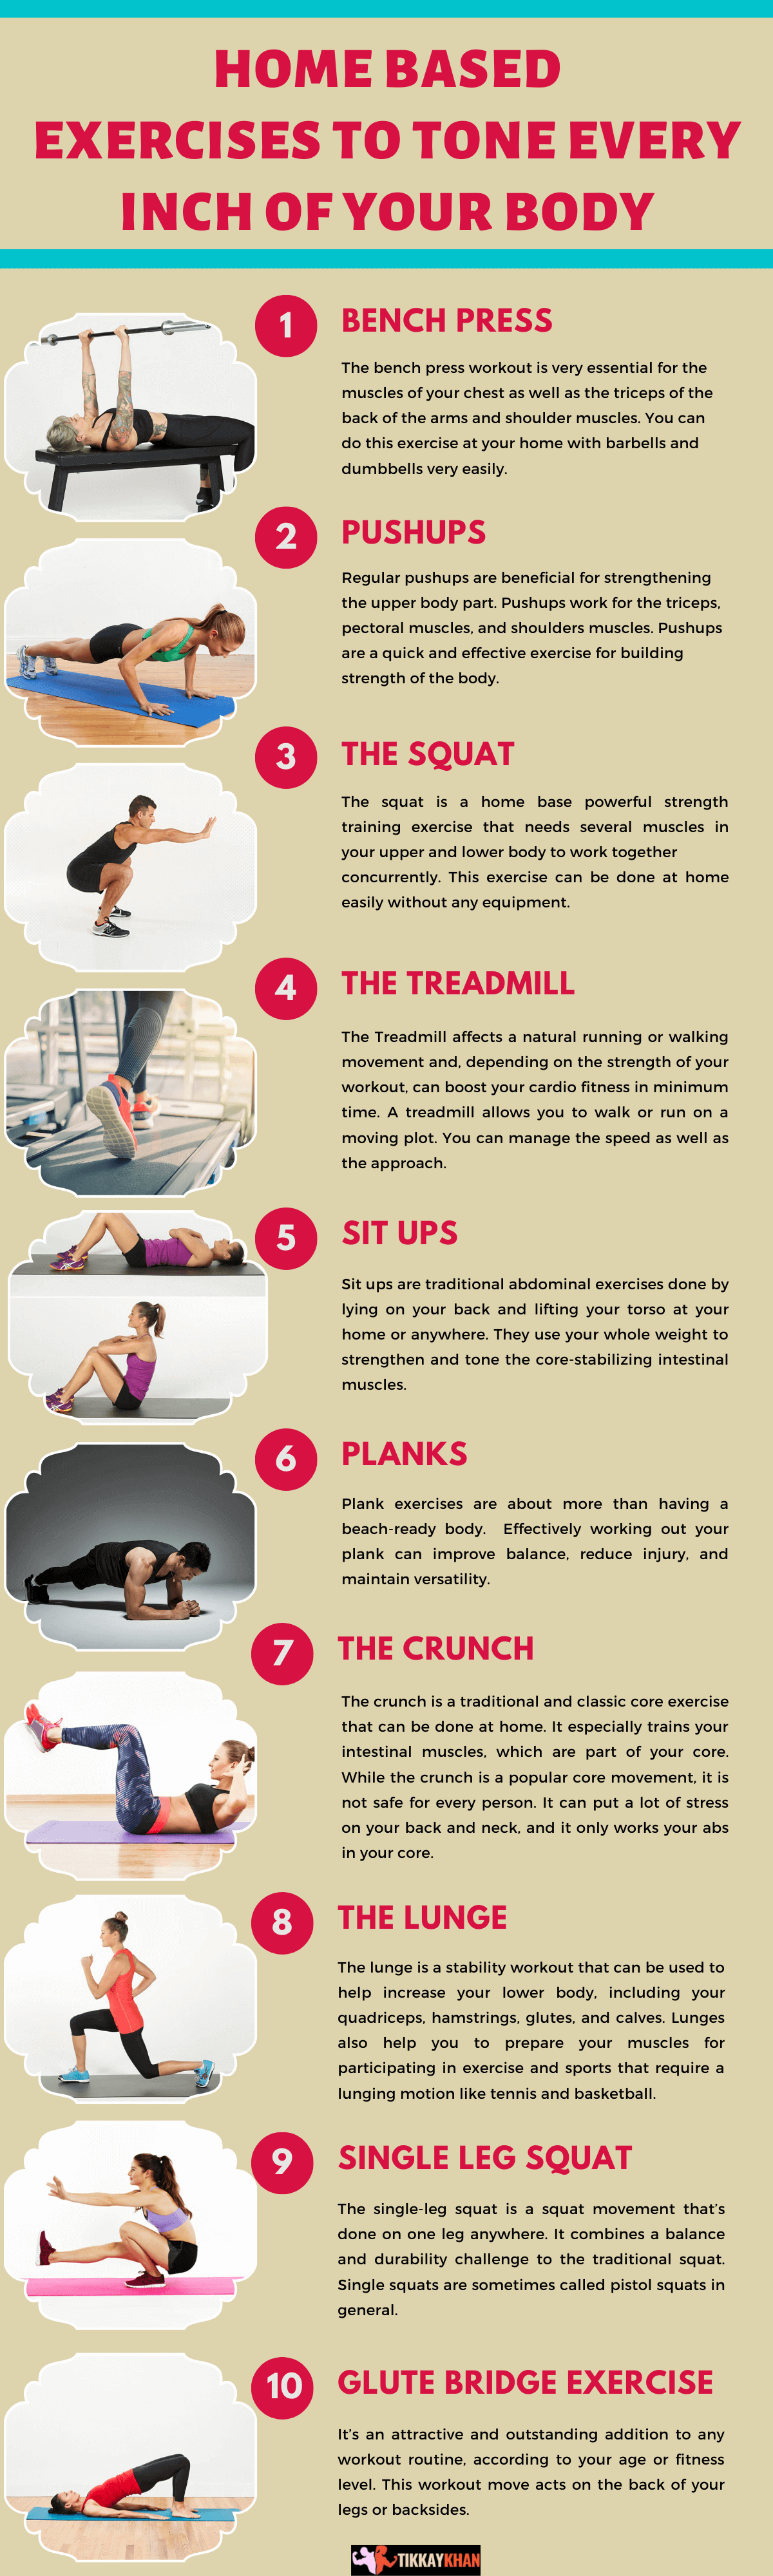
3. The Squat
The squat is a home base powerful strength training exercise that needs several muscles in your upper and lower body to work together concurrently. This exercise can be done at home easily without any equipment.
Numerous of these muscles help power you through everyday tasks such as climbing stairs, bending, walking, or carrying heavy loads at your home at the workplace. They also help you a lot to perform athletic-related exercises.
3.1 How to do an Effective Squat at Home
Known as an air squat or a bodyweight squat, the most fundamental kind of squat uses just your body weight for stability. Changes of the squat can combine weights, like barbells, or resistance bands.
Here are some steps to do an effective squat at home:
- You should start with your feet slightly more extended than hip-width apart of your body.
- Now, keep your chest up, retain your abdominals, and move your weight onto your feet as you push your hips back into a sitting pose.
- Now, lower your hips until your thighs are equal or almost equal to the ground.
- You should observe the squat in your glutes thighs and.
- Now, pause with your knees over, but not behind, your digits.
- Breathe and push back up to the opening point.
- Now, repeat these steps according to your exercise routine.
3.2 Benefits of the Squat
There are a lot of benefits of squat, some benefits are here to doing squat.
- Squat makes your strong core muscles which can make movements like turning, bending, and even standing easier in your routine life.
- It reduces the risk of injury. When you increase the muscles in your lower body, you are better able to perform full-body movements with correct form and balance.
- The Squat is a big source of calories. Calorie burning is often likened to cardio exercises such as walking, running, or cycling.
- The Squat increases the muscles of your lower body. Your lower body blows some of your largest and most strong muscles.
- The squat can be done anywhere without any equipment. You can do this exercise at your home very easily.
3.3 Tips to do the Squat at Home
- Make sure you have a solid floor or ground. Most squat exercises need you to start with your feet slightly wider than shoulder-width aside.
- Keep your eyes sharp and forward. While it may seem normal to look down when performing a squat, you will want to keep your gaze accurate ahead.
- You should keep your correct. Avoid turning your shoulders or back. You should just focus on keeping your spine upright and at a neutral point, with your head neutral, not staring up or down.
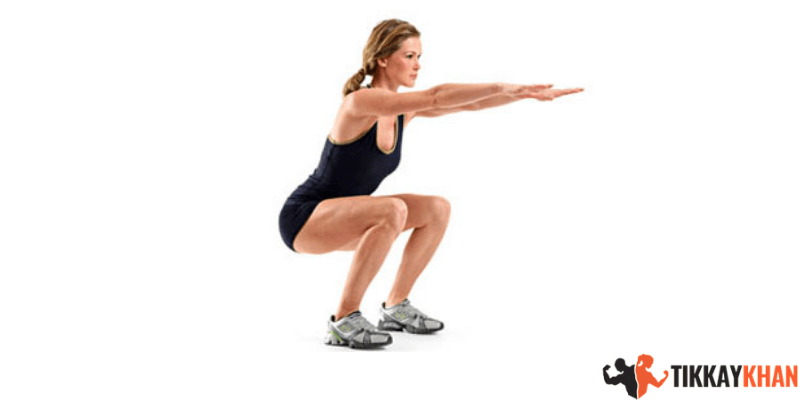
4. The Treadmill
It’s probably no surprise that when it comes to indoor workouts, the Treadmill is one of the most popular and famous aerobic and cardio exercise machines.
The Treadmill affects a natural running or walking movement and, depending on the strength of your workout, can boost your cardio fitness in minimum time.
A treadmill allows you to walk or run on a moving plot. You can manage the speed as well as the approach.
4.1 Benefit of Treadmill Exercise
You can control your workout
- One of the great benefits of treadmill exercise is the versatility you have.
- Whether you want to do a quick walk or a climbing run, you have the option in the machine to dial in the accurate speed and incline of your exercise.
- Most treadmills also allow you to choose from a type of training program at your home.
- Having more control over your exercise may make it easier to grasp your fitness aims.
4.2 Increases Leg Muscle
- Running or walking on a treadmill machine can strengthen your leg muscles very easily at home, including your quadriceps, hamstrings, and freemartins.
- A treadmill exercise can help you strengthen your hip flexors and glutes.
- To strengthen your legs and to help stop injury, practice doing squats and jumps several times a week in interest to your treadmill exercises.
4.3 Some Tips to Do Treadmill at Your Home
Jogging or running on a treadmill machine can put more strain on your bones and joints compared to working out on an elliptical trainer or another machine.
- To reduce the risk of injuries to your body, always start your treadmill exercise with a warm-up and end with a cool-down.
- If you find that running on the treadmill is too hard for your body, you can try changing to cardio workouts that are more sensitive to your bones and joints, like swimming or jogging.
- You can also try reducing the number of miles you run every week on your treadmill machine, or you could fluctuate between running and walking.
In short, a treadmill can help you strengthen your leg muscles, hip flexors, and glutes, but it does not target as many muscle groups as an oval.
RELATED: Best Exercise Machines for Home
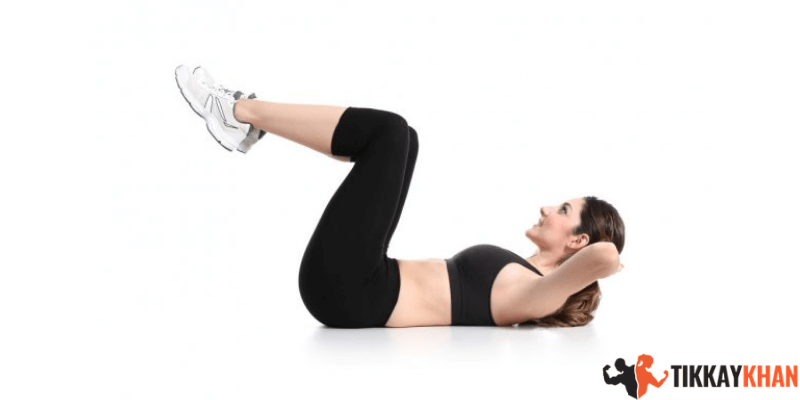
5. Sit Ups

Situps are traditional abdominal exercises done by lying on your back and lifting your torso at your home or anywhere. They use your whole weight to strengthen and tone the core-stabilizing intestinal muscles.
Sit-ups promote a good position by working the lower back and gluteal muscles of your body.
5.1 Benefits of Sit-ups
- Core strength is one of the greatest motivators for doing sit-ups. By strengthening, tightening, and toning your core, you decrease your risk of back pain and injuries of your body. You will be able to move with more consequential ease as you complete your daily routine work and participate in active exercises.
- Sit-ups build muscle strength in the inside and hip muscles. Sit-up performance may be a valuable symbol of muscle loss.
- A strong core helps to keep your body balanced and stable as you move throughout your daily routine and activities. Sit-ups help your lower back and hip muscles to work collectively with your gastric muscles. A good balance and stable body make you less likely to fall and injure yourself.
- Sit-ups build strength in the lower back and hips. A strong core provides a solid, firm center, making back pain and injury less expected.
- Increased flexibility improves the circulation of blood and the concentration of muscles. It reduces stress and boosts energy levels in the body.
5.2 How to Do a Traditional Sit-up
Traditional sit-ups may be a welcome bonus to your fitness system due to their effectiveness and uncomplicated strength. You can build strength by using weights or an incline.
- You have to lie on your back with flexed knees and your feet tied.
- Now, tuck your chin into your chest to stretch the back of your neck.
- Join your fingers at the base of your head, cross your arms with your hands on different shoulders, or place your palms down beside your body.
- Breathe as you lift your upper body toward your legs.
- Breathe as you gently lower yourself back down to the ground.
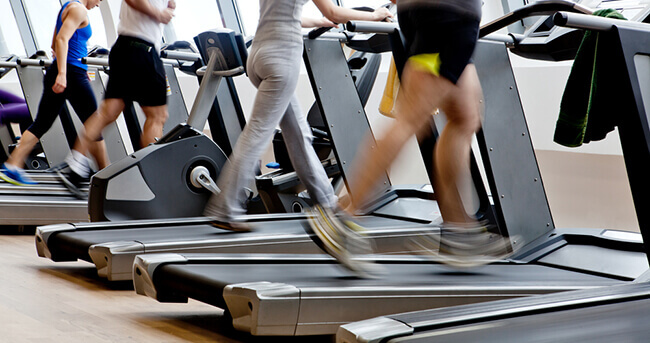
6. Plank
Plank exercises are about more than having a beach-ready body. Effectively working out your plank can improve balance, reduce injury, and maintain versatility.
But if you are continuously doing crunches and sit-ups at your home with the hopes of achieving a six-pack body, you may be exercising effectively.
Planks are a great alternative to crunches that can be done at home, planks can help improve core strength and stability of your body.
6.1 How to Do Planks at Home
The simple action of planking is not so hard to pull off, but holding the position is a completely different story in doing planks.
Here are some types of planks.
- High planks
- Low planks
6.2 High Planks
- To start high planks get into the top or start a pushup position on the ground.
- Now, keep your palms and toes strongly planted on the floor, your back upright, and your core tight.
- A saggy back during a plank can result in lower back injury, later on, so be sure not to settle your form.
- Do not let your head sag during planks.
6.3 Low Planks
To do low planks, lower down to your forearms, keeping the same positioning as the high plank.
6.4 Side Planks
- Lie on your right side and prop yourself up onto your right forearm, which should be on the floor.
- Your elbow should be in sequence with your shoulder.
- Now, you should raise your hips so that your body forms a straight line to the floor, and along with the ground, your body shapes a triangle.
- The sides of your right foot will also be supported on the floor. You can try heaping your left foot on top of your right foot or putting your both feet on the floor.
6.5 Benefits of planks
So, what accurately is it about planks that make them a more powerful and effective movement than crunches and sit-ups?
- Planks activate more muscles in your body.
- Planks do not just work your core they work your whole body.
- Planks need your arms, your legs, and all of your abs, making them an all-encompassing exercise and a more efficient way to workout.
- Planks can help you to improve your posture if you work the whole day at an office desk.
- Planks can help you develop isometric strength in your core muscles, which gives you the power to keep from leaning while standing or sitting for long periods at your business places.
- Planks help you to increase your body flexibility.
- Planks are a simple and great workout to develop the lower half of your body.
RELATED: Best Plank Exercises For Six-pack
7. The Crunches
The crunch is a traditional and classic core exercise that can be done at home. It especially trains your intestinal muscles, which are part of your core.
While the crunch is a popular core movement, it is not safe for every person. It can put a lot of stress on your back and neck, and it only works your abs in your core.
7.1 How to do a Crunch at Home
The standard crunch is done on the ground. To make crunch more pleasant, you can do it on a workout mat.
- Lie down on your back.
- Set your feet on the floor.
- Flex your knees and put your arms across your chest.
- Engage your abs and breathe.
- Breathe and lift your upper body, holding your head and neck relaxed.
- Breathe and return to the starting point.
- Do it again and again.
7.2 Benefits of the Crunches
- Crunches completely work for the abs.
- Crunches are helpful if you are trying to get a six-pack body.
- It can be done at home or anywhere without any equipment.
- As a bodyweight workout, the crunch can be done anywhere.
- In short, crunches are ideal and simple for most beginners.
- The crunches do not involve the oblique or other core muscles, so it may not be the best workout if you’re looking to increase your whole core.
7.3 Risk of Neck and Back Injuries
There is a risk for back and neck injuries during crunches. During crunches, your spine flexes. This may put a strain on your back and neck, and increase the risk of injury in your back and neck.
Because of the flexing neck and back that’s required to do this workout, it may not be safe for older adults, particularly those who have had a back or neck injury.
So, kindly make sure your starting points and other steps to do crunches at home.
8. The Lunge
The lunge is a stability workout that can be used to help increase your lower body, including your quadriceps, hamstrings, glutes, and calves.
Lunges also help you to prepare your muscles for participating in exercise and sports that require a lunging motion like tennis and basketball.
8.1 How to Do a Lunge
- You should start by standing up tall on the floor.
- Now, you should step forward with one foot until your leg moves at a 90-degree angle.
- Your rear knee should remain identical to the ground and your front knee shouldn’t go behind your toes.
- Lift your front lunging leg to back to the starting point.
- Repeat 10 to 15 reps on one leg, or switch off between legs until you have totaled 10 to 15 reps per leg.
8.2 How to Do a Walking Lunge
A walking lunge acts the same muscles as a simple lunge, but it may help raise your heart rate from the extra movement.
- In the walking lunge, you should start by performing a basic lunge with your right leg lunging forward.
- Rather than returning to a standing pose, start to lunge forward with your left leg so it’s now in a lunge pose.
- Your right leg should stay in a position to support you.
- Resume this “walking” motion as you continue to lunge forward, alternating your legs, for 15 to 20 reps on each leg.
8.3 How to Do a Lunge with a Torso
A lunge with a torso twist provides you the combined benefit of working your abdominals in extra to your glutes and quads.
Start by performing a simple lunge with your right leg lunging forward.
- After your right leg is lunged forward in front and you are feeling calm, use your core to twist your torso to the right.
- Now, hold for a few seconds.
- Don’t move your legs out of the lunge situation.
- Twist your torso back to the center point.
- Step back to stand with your right leg.
- Turn your legs and lunge forward with your left leg, and, once supported, twist to the left this time.
- Complete 15 lunges with twists on each side.
8.4 How to do a Side Lunge
In addition to working your hamstrings, glutes, and quads, aside lunge also works your internal thigh muscles.
How to do a side lunge at home:
- Start standing tall.
- With feet hip-width distance apart.
- Take a full step out to the left.
- Flex your left knee as you push your sides back.
- Keep both feet flat on the ground during the side lunge.
8.5 Take Care
You should take care to do lunges with proper form. As you lunge, your knee should not go over your digits.
Do not stretch your leg too far in any way when you lunge, either. Accurately performing lunges can help reduce your risk of injury.
8.6 Single Leg Squat
The single-leg squat is a squat movement that’s done on one leg anywhere. It combines a balance and durability challenge with the traditional squat. Single squats are sometimes called pistol squats in general.
A single-leg squat type of squat is an intermediate to advanced workout. You should only move on to single-leg squats after you have learned the squat movement on both legs. But if you are new to this move, it can also be adjusted using a chair or table, etc.
8.6.1 How to Do a Perfect Single-Leg Squat at Home
You don’t need any exercise machine to perform a single-leg squat at home.
You can just hold a dumbbell in each hand or a stress ball with both hands if you are looking for more of a challenge during a single-leg squat at your home.
- You should start by standing on your right foot on the floor.
- Now, lift your left leg out and hold it out accurately and lightly in front of your torso.
- You could also just turn your knee and keep your left leg raised to start.
- Your arms can be on your front to balance your body.
- You should keep your core involved and your torso up during the movement.
- Now, start to push your hips back as you blow into a squat form.
- The aim is there to get low enough that your hips are equal to the floor.
- Press your glutes as you push into the right leg to stand back up.
- Try to keep your left leg up between reps during this squat.
- Do 10 to 15 reps on this side before switching to the left leg.
- Make this squat part of your daily workout.
8.6.2 How to do a Single-leg Squat with the help of a Chair at home
If you are a beginner or if balancing is hard for you during the single-leg squat, you can do this move with the help of a chair at your home.
- Start seated in a chair with your torso up and your core engaged to perform single-leg squat, if you are a beginner.
- Seated, increase one leg straight out in front of you.
- Put your weight at the end of your other leg which will stay on the floor.
- Use your arms to move you to stand up on the ground.
- Balancing on your grounded leg, weight at the end of your leg.
- Keeping the same leg raised, slowly lower yourself back down to sit back in the chair.
- Perform 10 to 15 reps in one set. Change legs.
- Perform up to 3 sets of a single-leg squat.
8.6.3 Benefits and Cations of a Single-Leg Squat
The single-leg squat move presents slightly several benefits than the simple squat move.
Experts found that the single-leg squat move provided participants to achieve the same load of muscle activity in the hamstring, abdominal muscles calf, and hip but with less impact on the spine.
If you have a back injury, talk to your family doctor before starting a new exercise program such as a single-leg squat. They may suggest changes or other movements depending on your injury.
The single-leg squat is effective for challenging the balance of your body, which can also help you to work your heart muscles.
Adding a stress ball can help you focus more on building your balancing abilities during a single-leg squat at your home.
RELATED: Smith Machine Vs Squat Rack
9. Glute Bridge Exercise
The glute bridge workout is a varied, challenging, and effective workout to do at home.
It’s an attractive and outstanding addition to any workout routine, according to your age or fitness level.
This workout move acts on the back of your legs or backsides. The prime movers in your back chain cover your hamstrings and glutes.
9.1 Legs Pointed Outwards
This variation of the common Glute Bridge is an excellent way to target the outside of your thighs and glutes.
No equipment is needed to perform this move at home. This variation of the Glute Bridge primarily targets your iliotibial field and vast lateral.
9.1.1 How to do Legs Pointed Outward at Home
- Begin flat on your back with your legs bent at a 90-degree angle and feet put flat on the floor.
- Make sure your toes are turned outward at 45-degree angles and your knees are standing in the same way as your toes.
- Push down through your feet and push your hips up.
- You should feel this change fatiguing the outer portion of your thighs during this move.
- Make assured you keep your knees over your toes during the whole movement.
- Don’t let your knees move forward over the toes.
- In a managed motion, let your hips sink back down toward the floor. This completes 1 rep.
- You should perform 3 sets of 20 reps or 2 rounds of a 30-second hold.
9.2 Legs Pointed Forward
Showing your legs straight forward and keeping your knees close together helps target the center of your thighs and the glute muscles along your midline.
This variation of legs pointed forward originally targets your adductor longus, adductor Magnus, gracilize, and sartorius equipment needed to perform this move at home.
9.2.1 How to do Legs Pointed Forward at Home
- Begin flat on your back with your legs bent at a 90-degree angle and feet put flat on the floor.
- Make sure your toes are turned straight forward and your thighs are equal to each other.
- Push down through your feet and push your hips up.
- You should feel this change fatiguing the outer portion of your thighs during this move.
- Make sure you keep your knees over your toes during the entire movement.
- In a managed motion, let your hips sink back down toward the floor. This completes 1 rep.
- You should perform 3 sets of 20 reps or 2 rounds of a 30-second hold.
9.3 One-Leg Glute Bridge
Adjusting the Glute Bridge so that you are only doing one leg at a time is an excellent way to work on the individual strength of each leg and your core balance.
Depending on how you put your feet, this move can target any wanted muscle of the thigh or glute of your body equipment needed to perform this move at home.
9.3.1 How to do One Leg Glute Bridge
- Begin flat on your back with your legs bent at a 90-degree angle and feet put flat on the ground.
- Raise one leg off the floor straight up in the air.
- Press your weight down through the leg on the ground.
- Go to keep your sides squared.
- You should feel this change fatiguing your complete thigh and buttocks.
- In a commanded motion, let your hips lower back down toward the floor.
- This completes one rep of this move.
- Do 3 sets of 20 reps or 2 rounds of a 30-second hold.
9.4 Press Through the Heels Glute Bridge
Concentrating on pressing through your heels as you raise your hips will separate your glute muscles and hamstring muscles the most, versus pressing down through your hips.
This variation originally targets your biceps femoris, semitendinosus, gluteus medius gracilize, and gluteus maximus. No equipment is needed to perform this move at home.
RELATED: Top 5 Push-Up Variations for Unbeatable Upper Body Strength
9.4.1 How to do Press Through the Heels Glute Bridge
- Begin flat on your back with your legs flexed at a 90-degree angle and feet put flat on the floor.
- Start your weight down through your heels and raise your hips.
- You should feel this change fatiguing the back of your legs and glutes.
- Make sure you are targeting the back portion of your legs.
- Bring your toes off of the floor as you drive up.
- In a managed motion, let your hips lower back down toward the floor. This completes one rep of this move.
- Do 3 sets of 20 reps or 4 rounds of a 30-second hold.
9.5 Press through the toes Glute Bridge
Pushing your weight down through your toes will force your quadriceps muscles to do more work in this move.
It’s a good idea to exchange driving your weight through your heels and toes so that the anterior and back portions of your thighs both get tired.
This variation targets your rectus, vastus, lateralis, vastusmedius, femoris, and sartorius equipment needed to perform this move at home.
9.5.1 How to Press through the Toes
- Begin flat on your back with your legs flexed at a 90-degree angle and feet put flat on the floor.
- Raise your heels, push your weight down through your toes, and raise your hips.
- To make sure you are targeting the back portion of your legs.
- Bring your toes off of the floor as you drive up.
- In a managed motion, let your hips sink back down toward the ground. This completes one rep of this move of a press through toes.
- Complete 2 sets of 15 reps or 4 rounds of a 30-second hold.
9.6 Benefits of Glute Bridge of all Types
Strengthening your back chain plays a role in improving your lower back strength and core balance.
When performing perfectly with good form, the Glute Bridge can help increase the energy of muscles surrounding your spinal column, which improves your posture as well.
It’s an attractive and outstanding addition to any workout routine, according to your age or fitness level.
This workout move acts on the back of your legs or backsides. The prime movers in your back chain cover your hamstrings and glutes.
This move needs no equipment and very little space. This move can be done anywhere.
All you need is a place to lie down on the floor. It is a low-impact move, making it best for those with knee or hip problems.
In short, you burn a heavy dose of calories when you include the Glute Bridge in your aerobic exercises such as walking, running, and biking.
This may attract those who aspire to achieve fitness goals like losing weight, gaining strength, or trimming up.
This move is the best move for every inch of your body and you can perform this move at your home without any problem or difficulty. No equipment is needed to perform this move at home.