

Planks look simple, and that is exactly why they are so easy to get wrong. 💪
A plank is an isometric hold: you stay still, in one strong line, while your core works hard.
Done well, planks can build core strength, steadiness and endurance. Done badly, they mostly teach sagging hips and an aching back.
This guide keeps only six variations — the ones with a real, verified photo of that exact plank.
No belly-fat promises, no abs-in-days claims. Just clear form, honest facts and progressions you can actually use.
What a good plank looks like
Think of one straight line from your head to your heels. Your neck stays in line with your spine, not drooping or craning up.
Brace your stomach gently, squeeze your glutes, and keep breathing. Holding your breath does not make a plank better.
Your hips should neither sag towards the floor nor pike up towards the ceiling. Both are signs the set is over.
Short, clean holds beat long, sloppy ones every time. End the set when your form starts to fall apart, not after it already has.
If a full plank is too much today, drop to your knees or raise your hands onto a sturdy bench. The straight line matters more than the version.
Do planks burn belly fat?
Short answer: not on their own, and not from one spot. Planks strengthen the muscles under your midsection, but they do not melt the fat sitting on top of them.
In a 2011 study, people did abdominal exercises five days a week for six weeks. Their abdominal endurance improved, but there was no significant change in abdominal fat compared with a control group (Vispute et al., 2011).
A 2013 study that trained only one leg for 12 weeks found the same pattern in reverse: fat loss did not favour the trained limb (Ramírez-Campillo et al., 2013).
Fat loss, when it happens, tends to be whole-body. It depends far more on overall activity, sleep, food and time than on any single core move.
One small 2023 trial in 16 overweight men did report extra trunk-fat loss from abdominal endurance training, but it used long sessions that also included treadmill running. That is an interesting hint, not a reason to promise belly-fat loss from planks.
So use planks for what they do well: a stronger, steadier core. For wider fat-loss help, see exercises to reduce belly fat alongside a realistic, whole-body plan.
Stay safe while you plank
Stop if you feel sharp pain, pinching, numbness, or pain shooting down a leg. Muscle effort is normal; sharp pain is a stop sign. 🛑
If you have back pain, shoulder or wrist problems, are pregnant, or have a health condition, check with a clinician or physiotherapist before starting. This guide is general information only, not medical advice.
Keep your wrists comfortable in straight-arm planks. If they ache, switch to forearms, use a raised surface, or stop and get advice.
Never chase a time goal through pain. A 20-second plank with a straight spine teaches your body far more than a two-minute sag.
6 plank variations, each pictured
Work through these in order if you are new, or pick two or three that suit your level. Rest between sets, and repeat only while your form stays clean.
1. Forearm Plank
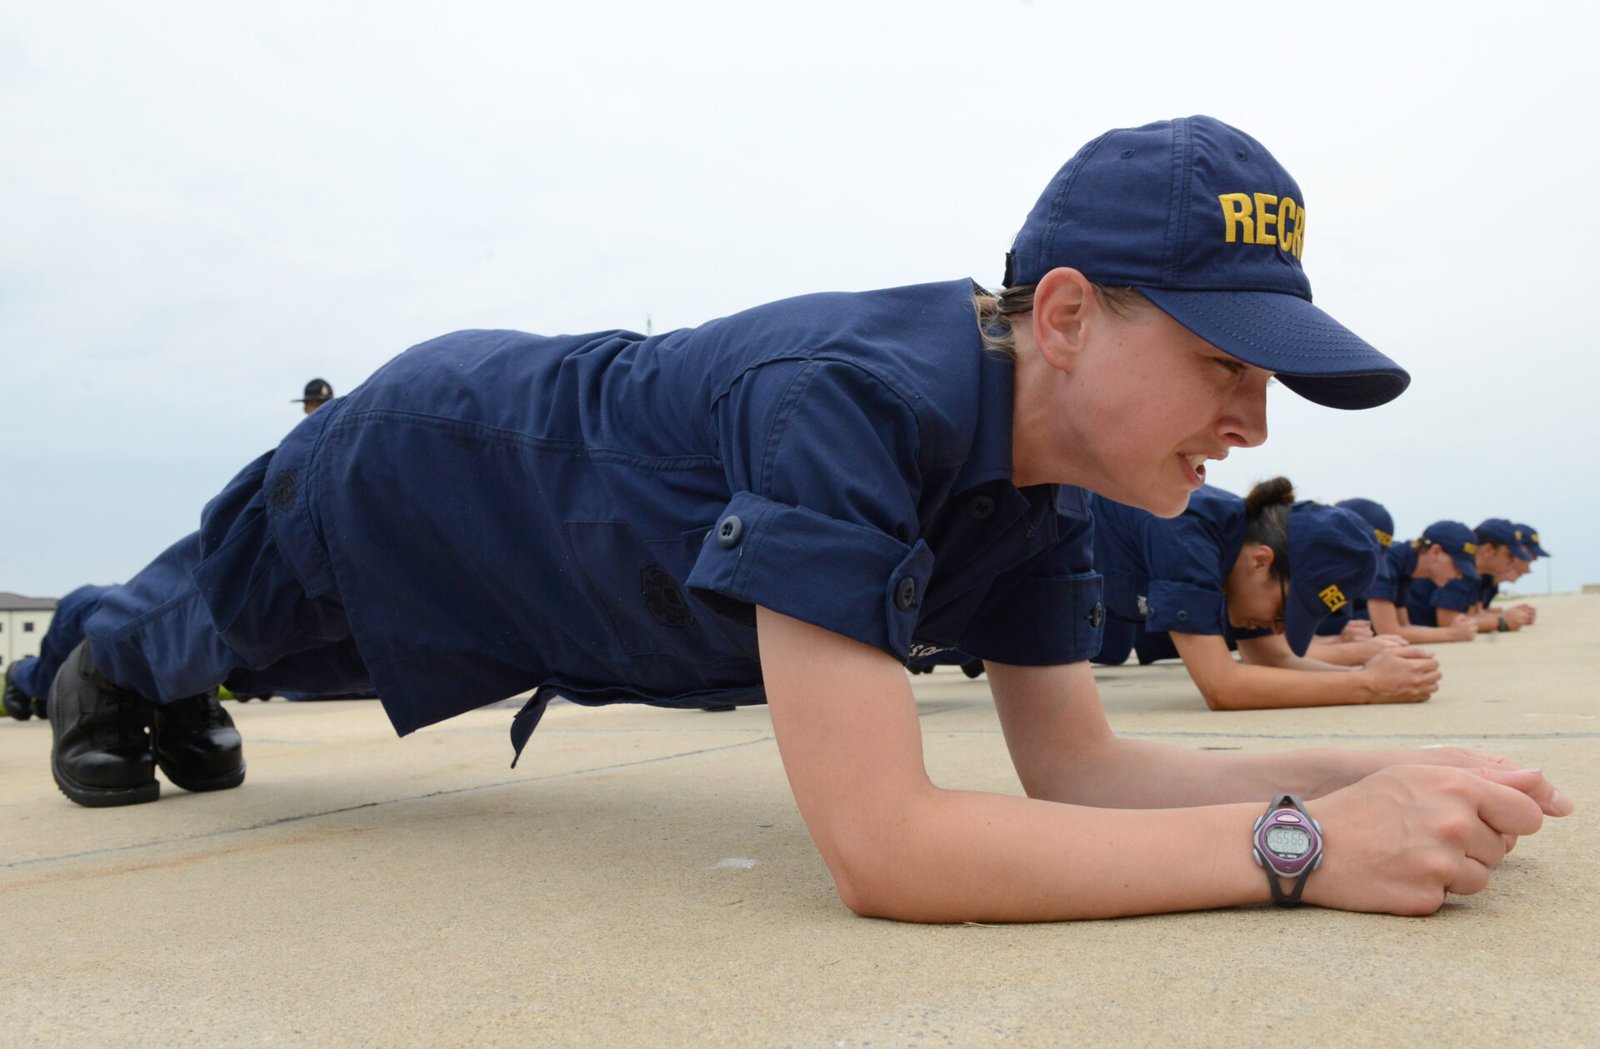
Rest on your forearms with your elbows directly under your shoulders. Keep your forearms parallel and your hands relaxed or lightly clasped.
Step your feet back, brace your core, and hold one straight line from head to heels. This is the best starting point for most people.
Make it easier by dropping to your knees while keeping the same straight line from head to knees.
2. High Plank (Straight-Arm Plank)
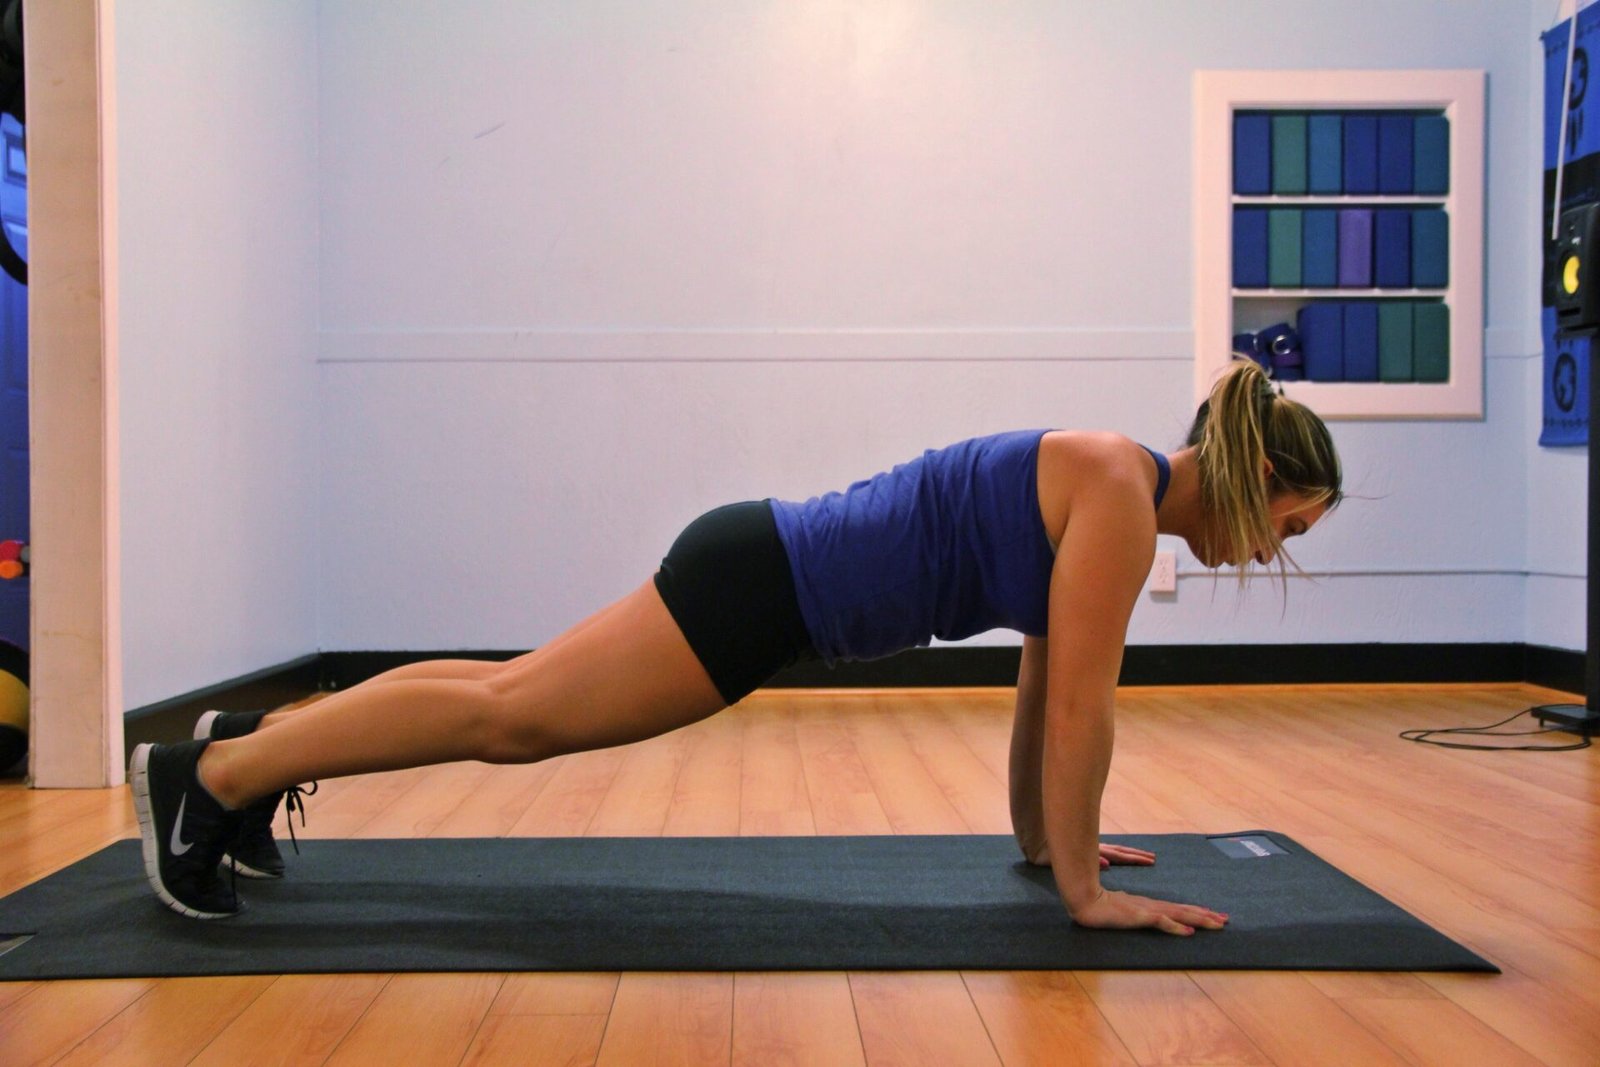
Place your hands under your shoulders, fingers spread, and press the floor away. Your arms stay straight, but your elbows should not lock hard.
Keep your shoulders away from your ears and your hips level. This version asks more of your shoulders and wrists than the forearm plank.
If your wrists complain, go back to forearms. There is no prize for pushing through wrist pain.
3. Side Plank

Lie on your side, elbow under your shoulder, and lift your hips until your body forms one straight line. Stack your feet or place the top foot in front for balance.
Raise the top arm if that feels steady, or rest it on your hip. Do both sides, even if one side feels much stronger.
Make it easier by bending your knees and lifting from the knees instead of the feet.
4. Reverse Plank (Back Plank)
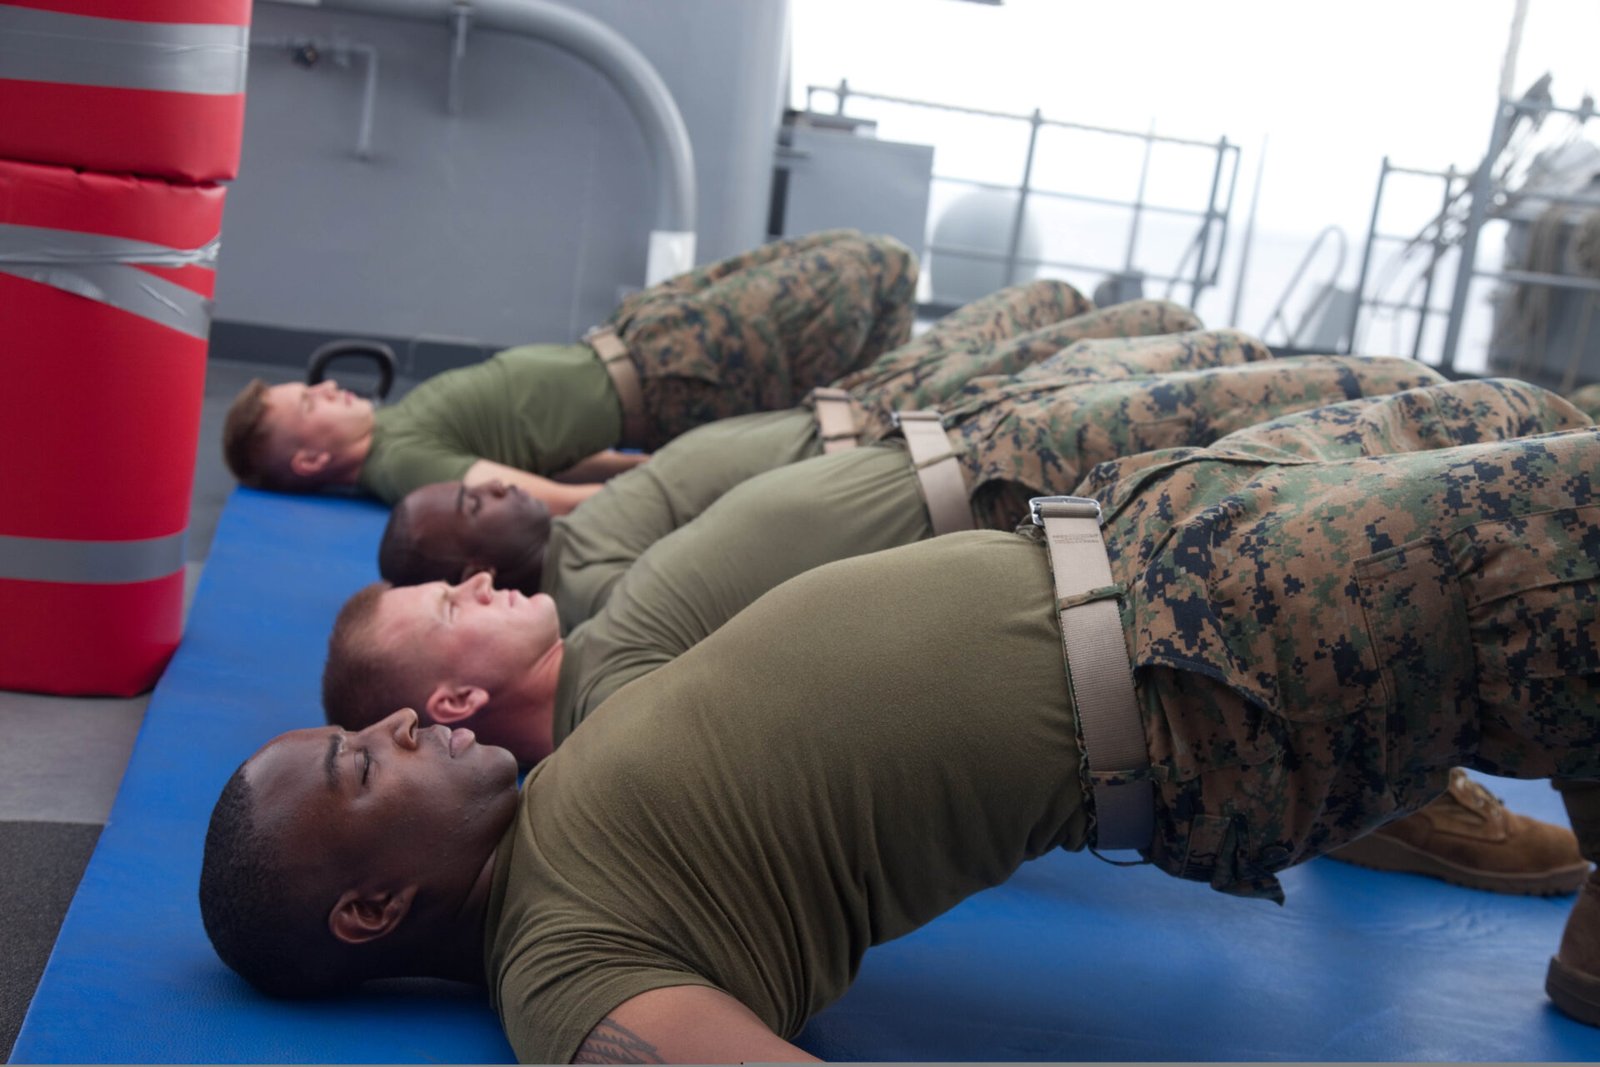
Sit with your legs straight and your hands behind you, fingers pointing towards your feet. Lift your hips until your body forms a long, rising line.
Look forward, not up at the ceiling, and keep your shoulders down. This version works the back of your body as well as your core.
Make it easier by bending your knees. If your shoulders feel pinched, stop and try a different variation.
5. Dumbbell Plank

Hold a dumbbell in each hand on the floor and set up in a high plank. Use flat-sided dumbbells that will not roll, and keep your wrists straight.
Hold the plank position first. Only add a slow row — lifting one dumbbell at a time — once the hold itself feels rock-steady.
This is an advanced step, not a beginner shortcut. If your hips twist as soon as you lift a weight, you are not ready for the row yet.
6. Medicine-Ball Plank

Place your hands on a medicine ball and your feet on a second ball, then hold a high plank. The wobble is the point — your core must work harder to stay straight.
Start with just your hands on one ball and your feet on the floor. Add the second ball only when the first version feels controlled.
Use a firm, non-slip surface and keep the balls still before you lift into position. Skip this one if balance feels unsafe.
A simple starter session
Pick the forearm plank and the side plank to begin. Hold each for as long as your form stays clean, rest, and repeat two or three times.
Add the high plank when it feels comfortable, then try one harder variation at a time. Progress is steadier form, not just longer seconds.
Two or three short sessions a week, done well, are a sensible starting rhythm for most healthy adults. Rest days still count.
For more core ideas once planks feel solid, see the best abs workouts and how to get a six pack for women with the same honest warning: visible abs depend on overall body fat as well as core strength.
Common plank mistakes
Hips sagging is the big one. If your lower back starts to arch, reset, shorten the hold, or drop to your knees.
Holding your breath, shrugging your shoulders, or staring at the ceiling all break the line. Breathe, relax your shoulders, and look at the floor.
Comparing your hold time with someone else’s is a trap. Bodies, injuries and training history differ, so your clean hold is your benchmark.
FAQs
Do planks give you a six-pack?
Planks strengthen your core, but a visible six-pack also needs low enough overall body fat. No plank variation can reveal abs on its own.
How long should I hold a plank?
Hold only as long as you can keep a straight line and breathe normally. For many beginners, that is far shorter than social media suggests — and that is fine.
Should I plank every day?
You do not need to. Short, well-formed sessions a few times a week, with rest in between, work well for most people.
Can planks fix back pain?
They are not a treatment. A stronger core may support everyday movement, but ongoing or sharp back pain needs a clinician or physiotherapist, not a plank challenge.
What if I cannot do a full plank yet?
Start with knees down or hands raised on a bench. The same straight-line form, at an easier angle, still builds real strength. See also belly pooch exercises for gentler core options.
This article is general fitness information only and is not medical advice. If you have pain, a health condition, or are pregnant, speak to a clinician or physiotherapist before starting a new exercise routine.