Yoga practice can be an incredible help for our daily life, helping you to find wisdom, courage, and strength. There is yoga poses for women for every situation you are in or for any kind of emotion that you find yourself in.
Practicing yoga can strengthen weak muscles and stretch tight ones, balancing the body to keep you away from injury and pain. It relaxes every part of you, from your mind to your body. Taking long and deep breathes calm your mind and nervous system, and the poses help in getting rid of the physical tension.
Also, read Exercises to reduce belly fat

Here are some of the best yoga types every woman should know:
-
Chaturanga Dandasana Yoga

-
Start with a plank, put your shoulders slightly in front of your hands and press the balls of your feet, pushing the soles of your feet back, as if there is a wall behind you.
-
Push back with your heels to engage the quadriceps and charge up your lower body, and reach forward. Create a straight line from your head to your feet.
AdvertisementContinue Reading Below -
Inhale and keep the heads of your shoulders and the tops of your thighs up and away from the floor, pull your lower body up and in, and release your tailbone toward the floor.
-
Exhale and start bending your elbows, keep them bent over your wrists and against the sides. Slowly come down to the floor and keep your body as straight as possible.
-
Bring your gaze down toward the floor, about 5 inches from your front, and continue to lower down until your shoulders and elbows are at the same height.
AdvertisementContinue Reading Below -
Take a deep breath, and continue to reach through the heels and crown of your head.
-
To come out of the pose, exhale and get yourself down on your belly or push back up to the starting position.
Benefits
It is a foundational pose that teaches you how to activate your legs. This asana tones and strengthens the arms, wrists, lower back, and the abdominal muscles. Thus, it prepares your body for the more challenging poses.
Just like a push-up, it strengthens the muscles around your spine and improves the posture. It takes patience to correct yourself in this posture so that you can avoid injuries. Once you are successful in this, you will see its power to improve your life.
-
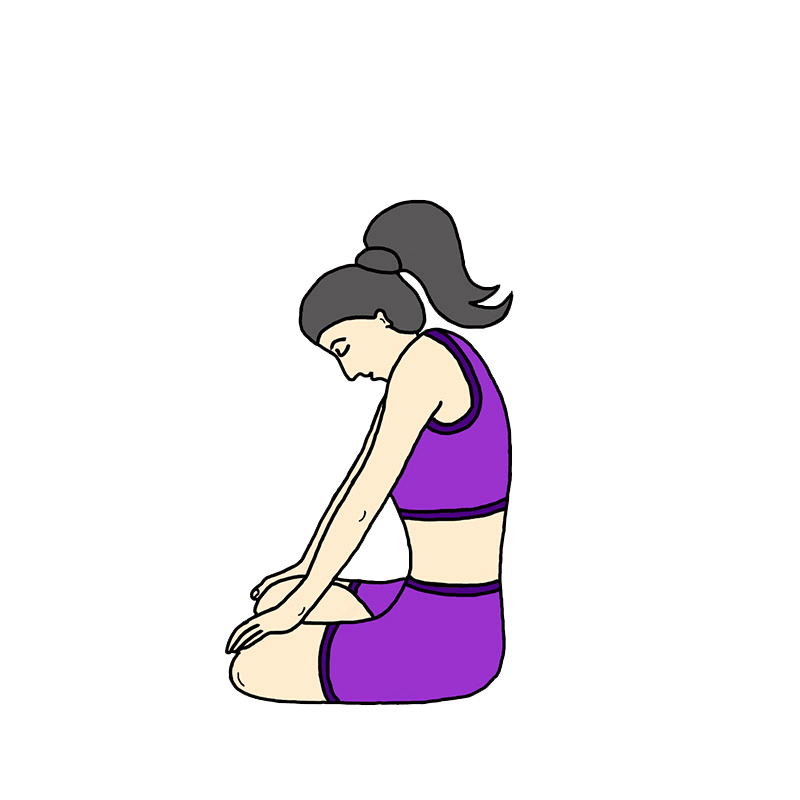
Jalandhara Bandha Yoga
-
Sit in a comfortable cross-legged position.
-
Place your hands on the knees with your palms facing upwards.
AdvertisementContinue Reading Below -
Inhale so your lungs are almost full, and then retain your breath.
-
Drop your chin down and lift your sternum towards your chin, relax your shoulders away from your ears.
-
Hold as long as you feel comfortable and then lift your chin up and finish inhaling before releasing the breath.
AdvertisementContinue Reading Below -
To practice in conjunction with the other two bandhas, first draw the pelvic floor upwards, engaging mula bandha. This leads to the abdomen drawing in and up under the ribcage in uddiyana bandha.
-
Finally, the chin drops to the chest and draws back to complete the maha bandha.
Benefits
It awakens the inner energy centres, especially the Vishuddhi Chakra. Improves the ability to retain the breath for a long period of time and develops the ability to concentrate. Beneficial for throat diseases and regulates thyroid function.
-
Ardha Pincha Mayurasana Yoga

-
From Table position, lower the forearms to the floor, tuck the toes under and lift the hips up towards the ceiling.
-
Spread the fingers wide apart with the middle finger facing forward, and the palms shoulder-width apart.
-
Press the forearms, fingers and the palms into the floor, and press the hips up and back. Keep the spine straight and long, reaching up high through the tailbone.
AdvertisementContinue Reading Below -
Keep the feet are hip’s width apart with the toes facing forward. Press the heels into the floor feeling a stretch in the back of the legs. The legs are straight, or you can have a small bend at the knees to keep the back flat.
-
Let the head and neck hang freely from the shoulders; the forehead can rest on the floor.
-
Breathe and hold for 2-6 breaths.
AdvertisementContinue Reading Below -
Bend the knees and lower the hips back to starting pose and release, or come all the way down to the child pose.
Benefits
It is a multifaceted pose. It is one of the best yoga for weight loss and it helps you prepare your mind and body for a full inversion. It opens the shoulders and upper back, lengthens the spine, stretches the hamstrings, builds upper body strength, and stimulates the nervous system.
It opens up upper body making it stronger and lean. It is also a great substitute for the poses where your legs are above your head, and you are not comfortable with them. As you practice this asana regularly, you will find yourself with the strength and energy that you had when you were younger.
-
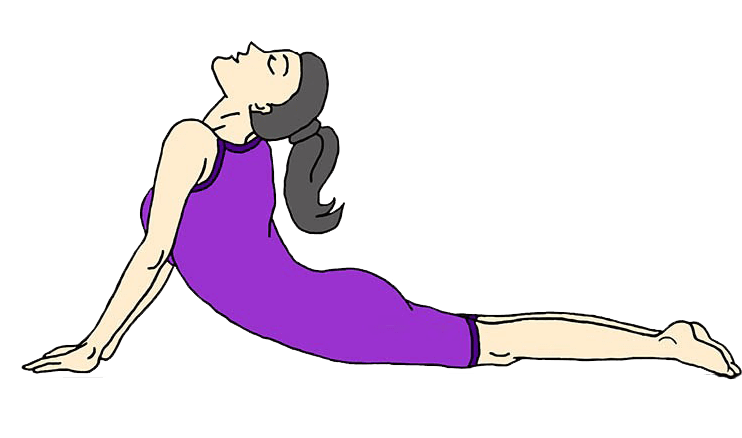
Urdhva Mukha Svanasana Yoga
-
Lie flat on the ground with your belly towards the floor. Your feet must face downwards, and your arms must be placed beside your body.
-
Gently fold your elbows. Place your palms next to your lowest rib.
-
Inhale. Press your hands on the mat as you gently lift your knees, hips, and torso off the mat. Your body weight must be spread across the top of your feet and your palms.
AdvertisementContinue Reading Below -
Look ahead, slightly tilting your head backward.
-
Make sure that your wrists are in the same line as your shoulders, and that your neck is not overstretched.
-
Hold the pose for a few seconds. Exhale and release.
AdvertisementContinue Reading Below
Benefits
This asana helps to make the spine supple and open up the back in all directions. It also helps to stretch the front area of the thighs and the hip flexors. The wrists are strengthened, and they tend to become more flexible.
With practice and patience, this pose will open up the ribcage fully, and also helps to increase your stamina such that you breathe to your full capacity. All of this makes this asana ideal for athletes and sportspeople.
-
Bharadvajasana Yoga

-
Begin in Staff Pose, seated with both legs extended and elongate through the spine.
AdvertisementContinue Reading Below -
Bend both knees and swing the heels to the outside of the right hip as the knees allow gravity to guide them towards the ground—almost as if you’re bringing the left leg into Easy Pose and the right leg nearly into Hero Pose.
-
Inhale and lengthen from the tailbone all the way up through the crown of the head.
-
On the exhalation, start to twist the torso to the left.
AdvertisementContinue Reading Below -
Hook the back of the right hand around the front of the left knee.
-
Inhale lengthening again, and on the exhale walk the left fingertips behind the back and around to the right.
-
Finally, if the bind is accessible, wrap the left arm around the back and grasp the right bicep with the left hand. Gaze to the left.
AdvertisementContinue Reading Below
Benefits
Releases pain and tension in the back, neck, and shoulders. It keeps your spine and shoulders supple
Eases a painful, stiff, sprained or fused the lumbar spine. Increases flexibility in the back and improves digestion.
-
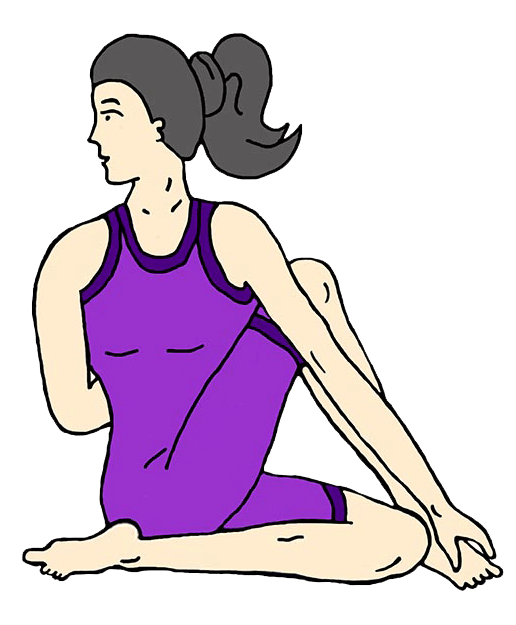
Ardha Matsyendrasana Yoga
-
Sit erect with your legs stretched out. Make sure that your feet are placed together and your spine is absolutely erect.
AdvertisementContinue Reading Below -
Now, bend your left leg such that the heel of the left foot lies next to the right hip. You could also keep the left leg stretched out if you like.
-
Then, place the right leg next to the left knee by taking it over the knee.
-
Twist your waist, neck, and shoulders towards the right, and set your gaze over your right shoulder. Make sure your spine is erect.
AdvertisementContinue Reading Below -
There are many ways you can place your arms to increase and decrease the stretch. But to do it simply, you can place the right hand behind you, and the left hand on the right knee.
-
Hold the pose for a few seconds, about 30 to 60 as you breathe slowly, yet deeply.
-
Exhale and release the right hand, and then the waist, chest, and finally the neck. Relax as you sit straight.
AdvertisementContinue Reading Below -
Repeat the steps on the other side, and then exhale and come back to the front.
Benefits
This pose makes the spine more flexible. It tones the spinal nerves and improves the way the spinal cord functions. It helps to stretch the muscles on one side of the body while compressing the muscles on the other side.
This asana helps to massage and stimulate the pancreas, and thus, helps those suffering from diabetes. It helps to regulate the secretion of both adrenalin and bile, relieves stress and tension that is trapped in the back.
-
Naukasana Yoga

-
Lie on your back with your feet together and arms beside your body.
-
Take a deep breath in and as you exhale, lift your chest and feet off the ground, stretching your arms towards your feet.
-
Your eyes, fingers, and toes should be in a line.
AdvertisementContinue Reading Below -
Feel the tension in your navel area as the abdominal muscles contract.
-
Keep breathing deeply and easily while maintaining the pose.
-
Hold the position for few seconds.
AdvertisementContinue Reading Below -
As you exhale, come back to the ground slowly and relax.
Benefits
This poses tones the leg and arm muscles and helps to remove belly fat. It is a very beneficial asana for people with a hernia. It improves digestion and the circulation of blood. It gives strength to thighs, hips, shoulder, and neck. Regulates the function of the liver, maintains the function of kidney, thyroid and prostate glands.
-
Matsyasana Yoga

-
Lie flat on your back and make sure that your arms are straight, with palms laid out on the floor.
AdvertisementContinue Reading Below -
Bring your palms gently under your buttocks.
-
Arch your head back slightly and rest your torso on the floor. Hold for at least 25 seconds.
-
Inhale and use your forearms to lift yourself off the mat.
AdvertisementContinue Reading Below -
Bring the top of your head to rest on the mat and hold this position for at least 25 seconds.
-
Return to the starting position, relax and inhale.
-
Repeat the process 8 to 10 times.
AdvertisementContinue Reading Below
Benefits
This pose helps to tone the abdominal muscles, and improving digestion. It strengthens and stretches the torso. The spine and the leg muscles get more flexible. The hamstrings get stretched and you lose weight from your lower body including your hips and thighs.
Stretching of the neck and spine stabilizes the functions of the parathyroid, pineal, pituitary, and adrenal glands, thus regulating the hormonal functions within your body. This means increased improvement in skin conditions, and your facial and throat muscles. This asana helps cure hypertension, arthritis, colitis, hypertension, and sciatica. It helps relieve stress and tension.
-
Bhujangasana Yoga

-
Lie flat on your stomach and make sure that your toes touch each other.
AdvertisementContinue Reading Below -
Place your hands flat on the ground at the shoulder level.
-
Put all of your weight on your palms, inhale and raise your head. Ensure that your arms are bending at your elbows at this stage.
-
Now arch your neck backward in order to replicate the cobra with the raised hood.
AdvertisementContinue Reading Below -
Make sure your shoulders are far away from your ears and the shoulder blades are firm.
-
Push your hips and feet down on the floor.
-
Hold for 20 to 30 seconds and breath normally, you should also be able to hold for more than a minute.
AdvertisementContinue Reading Below -
Now release the pose and bring your hands back. Rest your head on the ground by bringing your forehead in contact with the floor. Place your hands under your head. Then, slowly rest your head on one side and take a breath.
Benefits
It is a deep backbend that makes the spine stronger and more flexible. It also tones the organs that lie in the lower abdomen and stimulates the digestive, reproductive, and urinary systems. It helps in balancing the weight and making the buttocks firm.
It gives a good stretch to the shoulders, chest, and abdomen. It works as a great stress release. This pose is known to open up the lungs and the heart, also it relieves asthma.
-
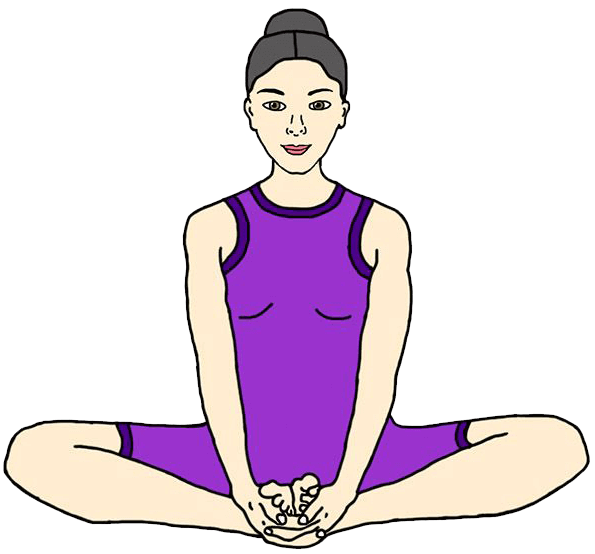
Baddha Konsana Yoga
-
Sit on a mat or a blanket in a comfortable position.
-
Bend your knees and press the soles of your feet on the ground.
-
Interlace your fingers around your toes or wrap your hands around your ankles.
AdvertisementContinue Reading Below -
Sit up in a straight position, inhale through your nose.
-
Fold forward and exhale through your nose.
-
Do this five to ten times.
AdvertisementContinue Reading Below
Benefits
This pose is known as one of the best yoga poses for the thighs, it stretches the hips, groins, knees, and inner thighs. It improves the blood flow and circulation throughout the entire body, it is very beneficial for women who are pregnant, as it can aid in childbirth.
Practicing this pose stimulates the abdominal organs, kidneys, heart, and ovaries. Ancient texts claim that this pose will destroy disease and fatigue. Sitting up straight with your spine also calms the mind to reduce stress, depression, and anxiety.
-
The Malasana Yoga

-
Begin with a squat and keep your feet close to each other, put your heels on the floor supported by the ground.
AdvertisementContinue Reading Below -
Spread your thighs a bit wider than the torso.
-
Take a breath and lean forward in a way that your torso fits in between your thighs.
-
Bring your palms in and press your elbows on your inner thighs. It will help you extend the front part of your torso.
AdvertisementContinue Reading Below -
Press your inner thighs against the torso. Stretch your arms and swing them and hold your ankles.
-
Stay in this pose for a few seconds, and then take a deep breath.
Benefits
It gives the lower back, the sacrum, the groin, and the hips a good stretch and instigates metabolism. It activates the digestive system. It tones the belly. It improves posture. It increases flexibility in your ankles and knees.
-
Padangusthasana Yoga

-
To begin this asana, you must stand up straight and place your feet parallel to each other. Your feet must be at least six inches apart, and your legs should be straight.
-
Contract your thigh muscles so that your kneecaps will be lifted outwards.
-
Now bend forward, aiming to touch your forehead to your knees. You must ensure that your head and torso move together.
AdvertisementContinue Reading Below -
Hold your big toe with the fingers of the respective side. The grip must be firm.
-
Inhale and lift the torso. Remember to straighten your elbows.
-
Exhale and bend towards your toes again. Do this a few times. Then, straighten your body. Don’t forget to keep the breath constant and your torso straight as you go up and down. Keep holding your toes throughout.
AdvertisementContinue Reading Below -
Come back to position.
Benefits
It calms the brain and relieves anxiety, stress, and mild depression. It is the best yoga pose for the hips. The liver and kidneys are activated. The calves and hamstrings get a good stretch and the thighs become strong. The digestive system and the reproductive system are stimulated.
-
Virabhadrasana 2 Yoga
-
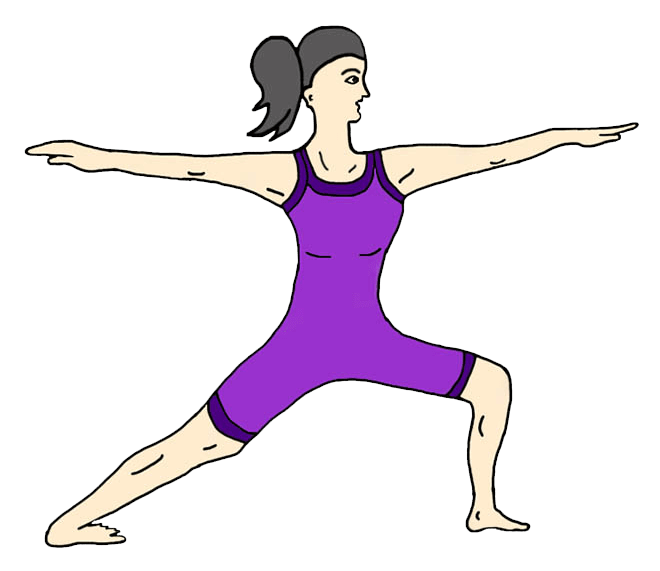
Stand absolutely straight and spread your legs about three to four feet apart.
AdvertisementContinue Reading Below -
Turn your right foot outwards by about 90 degrees and your left foot inwards by about 15 degrees. You need to make sure that the heel of your right foot is perfectly aligned to the center of the left foot.
-
Lift your arms sideways such that they are at your shoulder height. Make sure your palms are facing upwards, and your arms are parallel to the ground.
-
Take a deep breath, and as you exhale, bend your right knee. Your right knee should not overshoot your ankle. Your right knee and right ankle should form a straight line.
AdvertisementContinue Reading Below -
Now, gently turn your head, and look to your right.
-
As you get comfortable in the pose, you need to push yourself further. Stretch your arms, and gently push your pelvis down.
-
Stay in the pose as determined as a warrior and with a smile on your face. Keep breathing.
AdvertisementContinue Reading Below -
Inhale and come out of the pose. Drop your arms as you exhale.
-
Repeat the pose on your left leg by turning your left foot outwards by 90 degrees and your right foot inwards by about 15 degrees.
Benefits
Warrior Pose II requires both strength and stability. It is the best pose of yoga for the calf muscles, it also requires a whole lot of flexibility in the upper body as well as the hips. The Virabhadrasana balances both the steadiness and ease of the body.
This asana strengthens and stretches the legs and ankles. It also helps to thoroughly stretch the chest, lungs, groins, and shoulders. It helps to stimulate the abdominal organs and improves digestion. This asana helps to increase the stamina too.
Also read about: uses of baking soda