

🏠 You do not need a gym membership or a rack of weights to train your chest. A floor, a sturdy bench or step, and a push-up you can do with good form are enough to start.
This is a session, not a promise. Push-ups can build real upper-body strength when they are challenging and you make them harder over time — but no single move builds everything, and no article can guarantee a particular body shape.
For the wider case for push-ups in general, see our guide to the benefits of doing push-ups. And for the honest limits of push-ups on their own, read what push-ups can and cannot do alone before you expect them to carry a whole physique.
One form rule runs through every variation below: keep your body in one straight line from head to heels, brace your stomach and glutes lightly, and lower with control. If your hips sag or pike up, the rep has stopped being a good push-up — drop to an easier variation rather than grinding out sloppy reps.
If you have a shoulder, wrist or back problem, or you feel sharp pain during any variation, stop and talk to a clinician or qualified coach. This is general fitness information, not medical advice.
1. The Standard Push-Up 🏋️
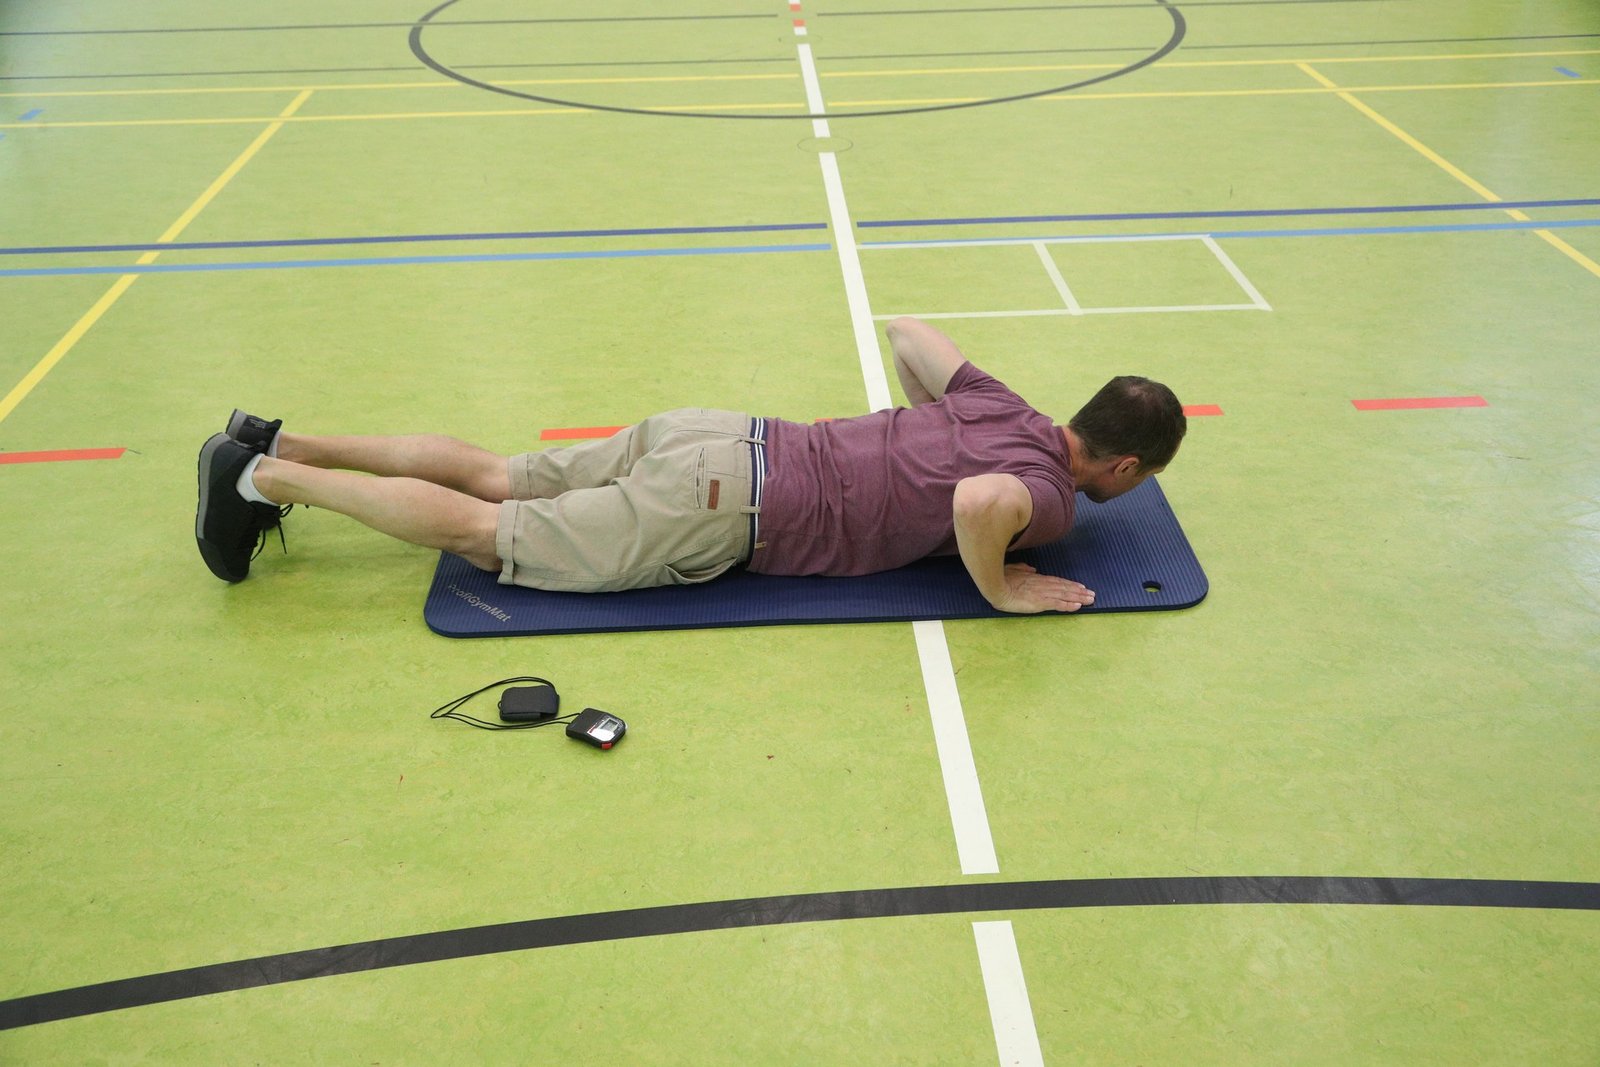
A man at the low point of a standard push-up on a mat. Photo: Uzltt123 / Wikimedia Commons
Start in a high plank with your hands roughly under your shoulders and your feet behind you. Lower your chest toward the floor with control, keeping your elbows angled back at roughly 45 degrees rather than flared straight out to the sides.
Press back up without letting your hips drop or rise. Your chest, shoulders and triceps do the pressing, while your core and glutes hold the straight line. Breathe steadily — do not hold your breath through the set.
Not there yet? Do the same move from your knees, keeping a straight line from head to knees, or start with the incline version below and work down gradually. A clean easier rep trains your chest far better than a sagging full one.
2. The Incline Push-Up 🌱

A man doing an incline push-up with his hands on a low wall outdoors. Photo: Ketut Subiyanto / Pexels
Put your hands on a sturdy bench, step or low wall, walk your feet back, and keep the same straight line from head to heels. Lower your chest toward the surface and press back up, just as you would on the floor.
Raising your hands lightens the load, so this is the friendliest starting point — and a useful warm-up even once floor push-ups feel easy. The higher the surface, the easier the rep; lower it gradually as you get stronger.
Use a surface that cannot slide or tip. A wobbly chair turns an easy variation into a risky one, so test it with your weight before your first set.
3. The Decline Push-Up 🔼
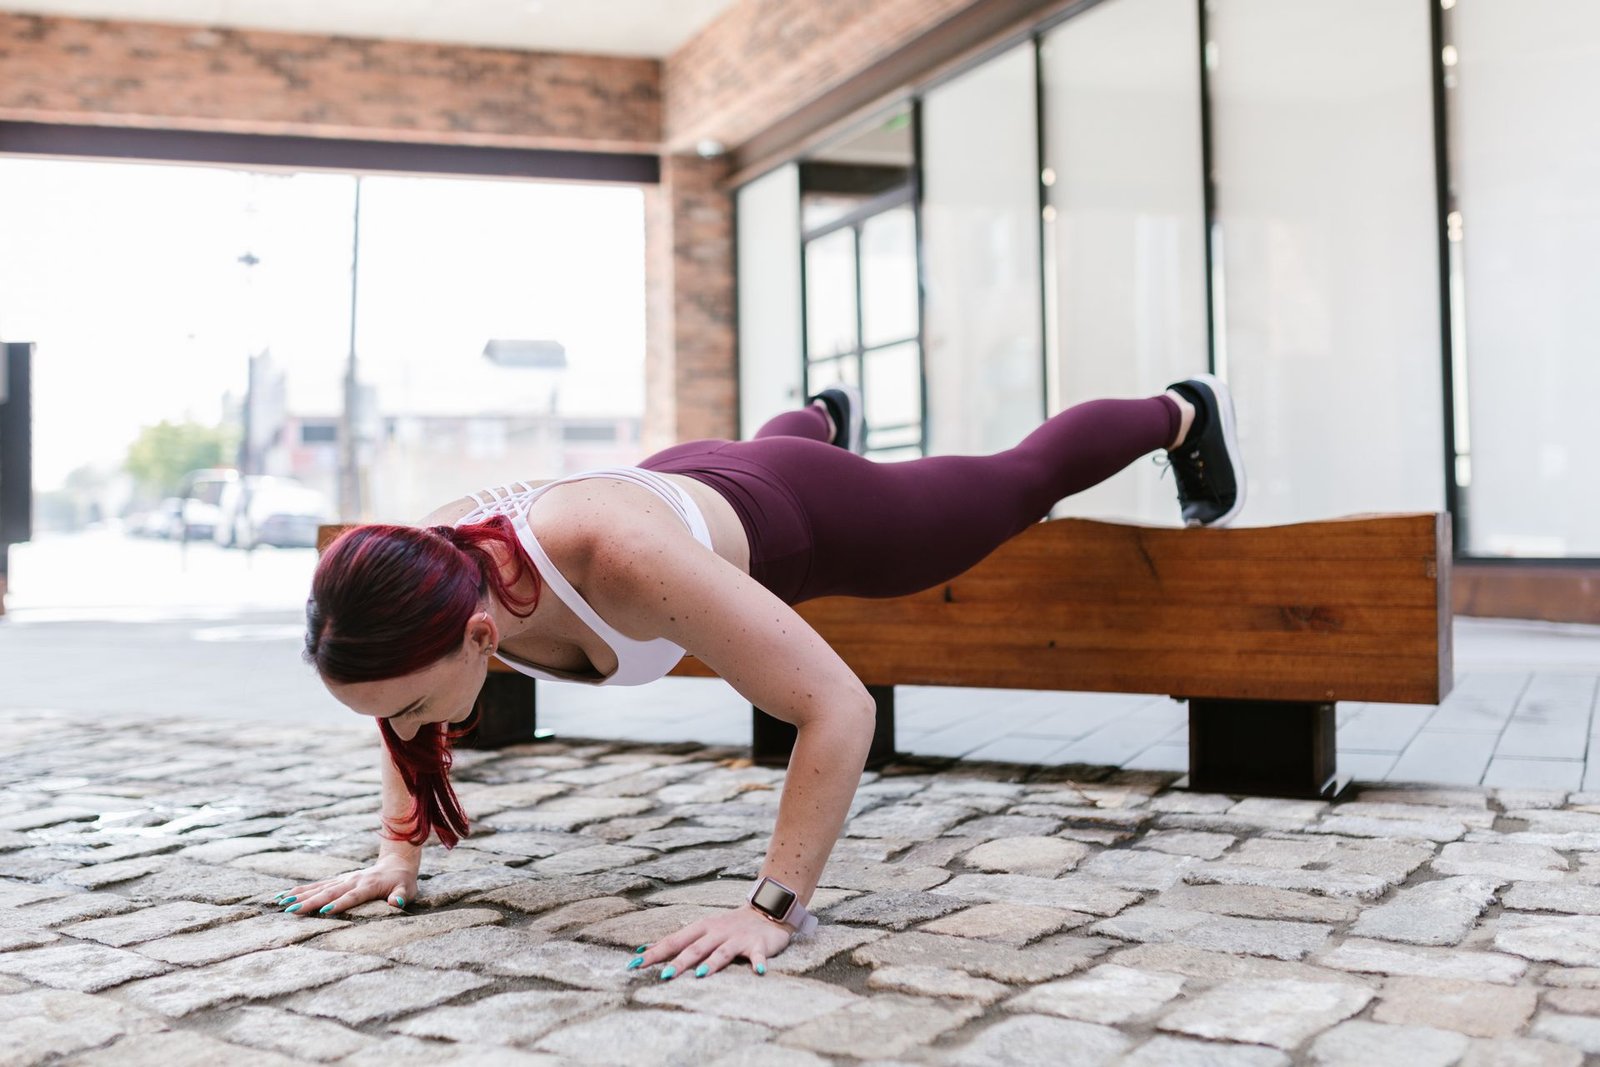
A woman doing a decline push-up with her feet on a bench behind her, hands on the ground. Photo: RDNE Stock project / Pexels
Now flip the angle: hands on the floor, feet up on a sturdy bench or step. Lower your chest toward the floor and press back up, holding the same straight, sloping line from head to heels.
With your feet raised you press more of your own weight, so this is the hardest of the three — it also tends to shift more of the work toward the upper chest and front shoulders. Earn it first: if your standard push-ups are not yet solid, this one will expose that quickly.
Start low. A small step is plenty at first, and a higher bench makes the move harder fast. Keep your neck neutral and look at the floor, not ahead of you.
Once the three moves above feel comfortable, the simplest way to progress is to narrow your hands. With your hands close together under your chest — thumbs and index fingers near-touching, or touching to form a diamond shape — the triceps work harder and the base of support gets smaller, so the same push-up feels much more demanding.
Only try the diamond shape once standard push-ups feel controlled, and back off if your wrists complain: a close grip loads the wrists more, and knee or incline versions of the close-grip move are a sensible step down. Keep your elbows tracking back rather than flaring wide.
A note on pictures: this article shows a photo for each of the three main moves above. Diamond and narrow-grip push-ups are described in words only, because no verified free photo clearly showing that hand position could be found. Rather than use a photo that shows something else, none is shown for them.
Putting a Session Together 🧭
A simple session shape is: warm up with incline push-ups, do your main work with standard push-ups, and finish with a small amount of decline work if your form holds. Rest as long as you need between sets to keep the next set clean.
Progress slowly, one dial at a time: a slower lowering, a lower incline surface, a slightly higher decline step, or an extra set over the weeks. Changing everything at once makes it impossible to tell what helped — and usually wrecks your form first.
As a rough starting point only, a beginner might begin with a few sets of a variation they can do cleanly, a few times a week, and build from there. That is a starting point to adjust to your own level, not a programme with a guaranteed result — our beginner push-up guide covers sensible starting ranges in more detail.
Do not expect overnight change. Our honest push-up results timeline sets out what a realistic wait looks like, and why consistency beats any single heroic session.
For the full catalogue of push-up variations beyond this chest session — including wide-grip and clap versions — see our 5 push-up variations guide, which this article deliberately does not repeat.
Frequently Asked Questions ❓
Can push-ups alone build a strong chest?
They can build genuine chest strength and muscle, especially for beginners and intermediates — provided the sets are challenging and you keep making them harder, rather than coasting on easy reps. A small study comparing push-ups with bench pressing at a matched load found similar chest growth over eight weeks, which is encouraging but not a guarantee for every lifter.
Push-ups alone still leave gaps: your back, legs and pulling muscles need their own work, and advanced lifters will eventually find bodyweight load harder to scale than a barbell. Think of push-ups as a strong foundation, not the whole house.
Which variation should a beginner start with?
The incline push-up. It teaches the straight-line plank and the pressing pattern at a lighter load, and you can lower the surface bit by bit until floor push-ups feel right. Jumping straight to decline or diamond versions usually just teaches bad form.
How often should I do this session?
Often enough to practise, with enough rest to recover — a few sessions a week suits most beginners, with at least a rest day between hard sessions. Soreness that fades in a day or two is normal; sharp joint pain is a signal to stop and reassess, not push through.
Do I need any equipment?
No. A floor is enough for the standard move, and a sturdy bench, step or low wall covers the incline and decline versions. That is the whole kit list — which is exactly why this session works at home.
💪 Strong, steady and honest beats fast and sloppy every time. Master the line, pick the variation that challenges you without breaking your form, and let the progress come rep by rep.